Showing posts with label Prudent Baby. Show all posts

Saturday, April 23, 2011

Easter Dresses

For Izzie's first Easter I couldn't wait to make her a little Easter Dress!

I've made an old t-shirt into a dress for her before (see it here) but never a dress from a pattern.

This is my version of Prudent Baby's Pretty Party Dress.

Those ladies sure do know how to make a.dor.a.ble patterns!

It was so easy to follow and the size is perfect for Izz who is almost a year old.

I'm also glad to say I only had to use 
my seam ripper for two very small sections.
This is progress for me....

I'm sooo excited for her to wear it!  
I LOVE this fabric I found at Hobby Lobby! 
(the dotted one was from the remnant bin - how great is that!?)


Not bad for my first attempt at baby clothes from a pattern, wouldn't you say?


Pretty impressed with my pearlized snaps, if I do say so myself.  
I had no idea it was so easy to add snaps!
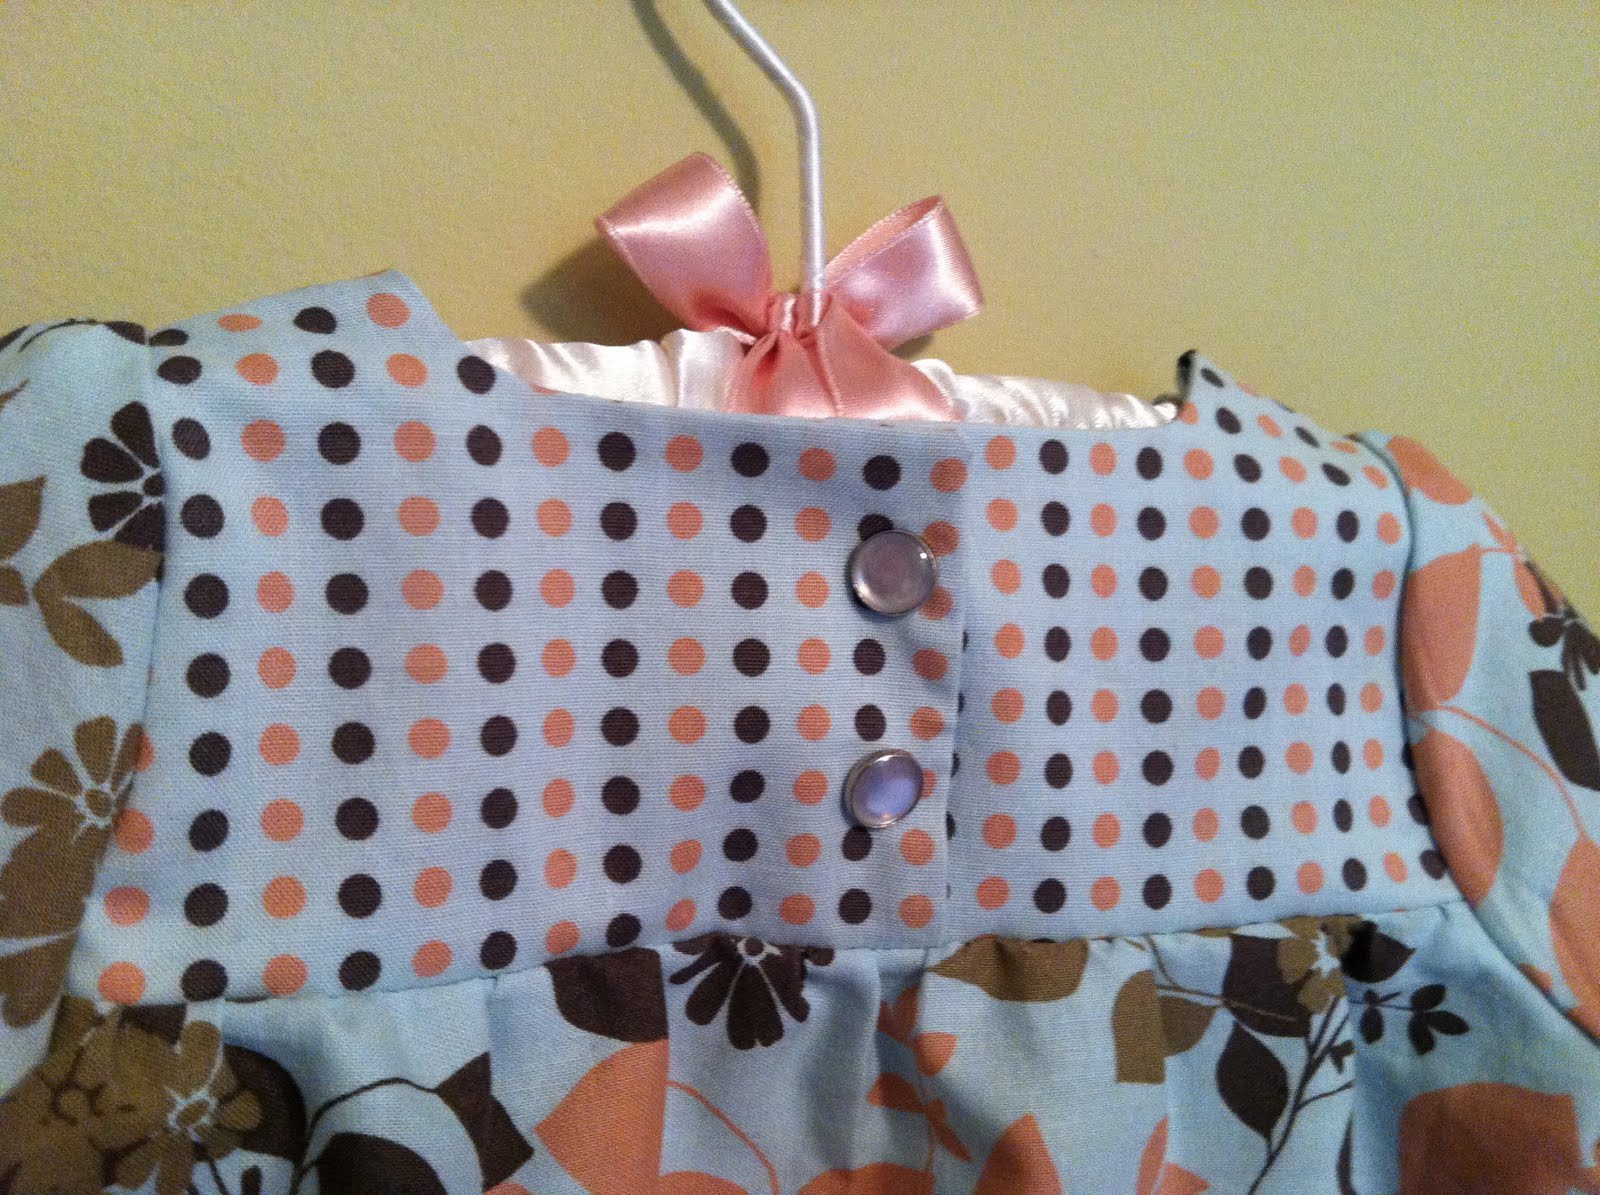

Sorry for the mediocre pictures - couldn't find 
the battery charger for the camera so had to use my phone instead.

Ta Da! 


Now for myself, I have this white dress that I bought for my high school graduation, 
(which I'm now realizing was 10 years ago already! AHH!) 
that I like and have worn a few times but was starting to look dingy.


I like the detail of the fabric.  
Sort of an eyelet I guess you'd call it.  
But it needed some updating.


 So after half a bottle of Rit Liquid in Fuchsia . . . 

I have a New Dress!
A bit deeper/brighter fuchia than I was hoping for 
(I'm not really a pink sort of girl) 
but I kind of love it!

(This was my first attempt at dying anything too - kinda fun!)


White cardigan lessens the punch a little 
(and the dress is a little too low cut for church and family dinner.)


Plus I made this pin from a bouquet of silk flowers I had laying around.  
The center color is what inspired me to get fuchsia dye.


All ready for Easter!

Happy Easter!
He is Risen!

Sunday, March 6, 2011

Sunday Nap Time

This would be more appropriately titled 
"How to make simple projects much harder".

More about that in a minute.

This is another "As Seen On Prudent Baby" project.

So this is what I made during nap time today...

BIAS TAPE!


Double fold bias tape actually.  I didn't measure how much I made but it sure is a lot.  Not a bad deal for a fabric remnant that couldn't have been more than $2.


I bought two of these bias tape maker do-dads today and had to try it out.  I used the 1" maker to make this 1/2 inch double fold bias tape.


Jamie and Jacinda over at Prudent Baby make up tutorials that are FAN-TAS-TIC and super easy to follow and pretty easy projects.

So how did I make this WAY harder than it needed to be?

Well if you would like to make bias tape AND get a lot of use out of your seam ripper this what you do.

When you cut the triangle off the side (see the tutorial so you know what I'm talking about) make sure you first sew it to the other side the wrong way not once but TWICE!! 

First I sewed the triangle on right side facing wrong side instead of right sides facing each other. 
Ugh. Stupid mistake right? 

The I sewed it on again and while I was marking the strips I realize that I sewed on the triangle going the wrong direction (so I sewed a trapezoid instead of a parallelogram.)

Unbelievable.
Seriously, I don't know what is wrong with me.
I consider myself a proficient sewer so I really can't believe I made stupid mistake TWICE!!

Oh well...lesson learned.


Sharing at these Link Parties
untitled


Lovely Crafty Home

Saturday, February 26, 2011

Recycled T-Shirt Dress

It's another Prudent Baby Project!  I just can't get enough! I have such a long mental "to make" list from their site.  Get the Recycled Bubble T tutorial HERE!

I really must start taking before and after shots of projects like these.  Next time.

I bought the original shirt at CVS...yes, CVS.  In college towns they sell college clothing for thrifty (read cheap) students like myself who don't want to walk across the street to the Book Exchange to buy a real UMD shirt.  So the shirt of course wasn't a great fit but it served the purpose for one Terps football game and maybe only a few wears after that.

But because I couldn't bring myself to get rid of a perfectly good shirt, I kept it.  And now it's an adorable little dress for my baby girl!


Joann's was out of white elastic thread when I went and because I was too anxious (or impatient) I just got the navy blue and went with it.  My first attempts at shirring turned out great!


My original attempt did not have those red panels under the arms.  The dress was WAY too tight so I cut slits under the arms and used left over sleeve material to extend the dress a little.  A little more elastic shirring and it fit great!


I think my favorite part is the sleeves! I used the hem that was already on the sleeves of the original shirt and just sewed two shirred lines on the other edge for the straps.


Baby Izz at 5 months. I keep thinking this will still fit her come spring but now I'm starting to doubt that.


Don't you just want to take a bite out of those chubby baby arms??


Thursday, February 24, 2011

Crib Sheet

I am so in love with how easy crib sheets are to make, I could easily make WAY more than we really need. (How many is that anyway?)


Baby Izz definitely needed more than one crib sheet (which is all we naive-new-parents had) and the options out there are so boring! Plain pink or white? Come on!!  Her room is also all green and yellow since we didn't know she was going to be a 'she' until she was born. I love that there is now a little bit of pink in her room!

So of course Prudent Baby has a tutorial, which I followed and it turned out perfectly!  Go check it out HERE

I found this fabric at Joann's.  WAY cuter than any store bought crib sheet I've seen, but I haven't really looked very hard.

I made a casing all the way around and threaded elastic through like Prudent Baby did in Part 2 of the Crib Sheet Tutorial - perfect fit!

George and Dolly approve also.


Adding this to the "things that make good baby gifts" list.


Sunday, February 13, 2011

Checkbook Covers

With last Christmas being our first with a child, many gifts became homemade ones.  For all of the women in my family I made checkbook covers using this pattern from Prudent Baby and decided to personalize them a little.  I followed the pattern but made it a 1/2 inch smaller so I could sew 1/4 inch seams. (I prefer 1/4 inch seams - not sure why.)  They were so pretty all laid out (even though my photog skills are not so awesome.) 


I really like toile and I liked it even more paired with the little bit more modern grey flower fabric for the inside (both were fat quarters from Joann's).


I LOVE the red fabric I used for this one (even though it's not a great picture and I can't figure out how to turn the photo...grrr).  I picked up a yard of it at a quilt and sewing expo and have been holding onto it for a few years waiting for a project I felt was worthy.  I love the little pattern on it.  (I have a piece of this fabric that contains a failed attempt at satin stick around the white box that I saved because I couldn't throw it out. BUT I turned it into another project!) I have one decorative stitch on my sewing machine and figured out that with a little variation in stitch length it's not so bad.


For all of these I took a little square of fabric, folding the corners into the center to place the initials on.  This one I just stitched around and around in pink thread until I felt like it was done.

You can see that I did the pink stitching after the pieces were all sown together which made it more difficult for sure because the pocket got a little in the way.

I've made so many things using these two fabrics (also from Joann's).  
There's my one decorative stitch again.


This was my first attempt at using bias tape on ANYTHING and it didn't turn out so bad.  It's not great either though - edges are a little wonky but good enough to gift.  But I LOVE this blue fabric (also a Quilt and Sewing Expo find - I also used it to make an apron) and I love how this one turned out.

Looking at this picture now I realize that I should have cut the fabric differently so the pattern made a little more sense and matched the outside, but oh well.  I just when you put a check book in there you can't really see the pattern much anyway.


This picture does not do this one justice. (I really need someone to teach me how to take better photos of my projects.)  I had some stiff denim material that I think was in a box of fabric I got from my mom.  It was stiff enough I did not using fusible interfacing on it like I did for all the other cover pieces.  The flower is made out of that red fabric that I LOVE so much, and I'm pretty proud of how I stitched it on.  I'm a little bummed you can't see it, but it looks like these flowers HERE on Make It and Love It.

Yummy red fabric again on the inside.  I actually made two of this one for two different people because I was so happy with how it turned out.

Don't you want to make your check book look adorable now?  My husband agreed to put our checkbook in this first cover that I made.  He's so patient with my crafting :)  The sizing is a little weird with that one. I think I changed the size of my template after I made it. A new one is in order.  Maybe out of the denim and lovely red fabric above. I don't know what I'll do when that fabric is all gone.  Sigh.

Related Posts Plugin for WordPress, Blogger...